Let's get straight to the point: the quality of your colonoscopy prep is everything. This isn't just about ticking boxes on a to-do list; it’s about giving your doctor the crystal-clear view they need to spot even the tiniest, most subtle polyps. Think of an excellent colon cleansing for colonoscopy as your most critical contribution …
Let's get straight to the point: the quality of your colonoscopy prep is everything. This isn't just about ticking boxes on a to-do list; it’s about giving your doctor the crystal-clear view they need to spot even the tiniest, most subtle polyps. Think of an excellent colon cleansing for colonoscopy as your most critical contribution to a successful and accurate screening.
Why a Squeaky-Clean Colon Is a Non-Negotiable for Your Health
The prep process for a colonoscopy often gets a bad rap as the toughest part of the whole experience. I get it. But shifting your mindset can make all the difference. Instead of seeing it as a hurdle, view the prep as an essential, proactive health measure. You’re taking a vital, hands-on role in the success of your own medical procedure.
A colonoscopy is, at its heart, a visual inspection. Imagine trying to find a lost earring in a messy, cluttered room. You might miss it completely. Now, picture that same room completely empty and spotless—that earring would be impossible to miss. Your colon is that room, and the polyps are what your doctor is searching for.
The Real Cost of a "Good Enough" Prep
When the preparation is subpar, the consequences are more serious than most people realize. Any lingering stool or debris can easily mask the colon wall, hiding precancerous polyps from your doctor’s view. This doesn't just undermine the reason for the procedure; it can lead to some pretty significant problems down the road.
- Missed Polyps: This is the biggest risk. Small polyps that could have been removed in seconds might be overlooked, giving them time to potentially grow and become cancerous.
- Repeat Procedures: If the view is obstructed, your doctor might have to stop the procedure entirely. That means you’ll have to do it all over again—another day of prep, another day off work, another copay.
- A False Sense of Security: An incomplete colonoscopy is dangerous because it can give you a clean bill of health when a potential threat is still lurking. It’s a risk no one should ever have to take.
The goal is always a "one-and-done" success. A meticulously clean colon gives your gastroenterologist the ideal conditions to perform a thorough, life-saving examination.
"Your most important contribution to the colonoscopy process happens before you ever leave your home. The quality of your bowel prep determines the quality of the examination."
What the Data Says About a Clear Colon
The medical community is united on this: the quality of your prep is a major factor in the success of a colonoscopy. It directly affects the adenoma detection rate (ADR), which is the percentage of procedures where a doctor finds and removes at least one precancerous polyp. A high ADR is directly linked to a lower risk of developing colorectal cancer.
It's alarming, but studies show that up to 30% of patients who undergo a colonoscopy have inadequate bowel prep. This severely compromises the procedure's effectiveness. In fact, a comprehensive 2019 review confirmed that the quality of the cleanse is a critical factor influencing these vital health outcomes. You can read the full review about bowel preparation quality here.
What this means for you is simple: committing fully to your prep protocol is one of the most powerful things you can do for your long-term health.
Taking Control of Your Preparation
For some people, especially those dealing with digestive issues like chronic constipation, getting a complete cleanse can feel like an uphill battle. When your bowel motility is naturally slower, the standard prep solutions might not be enough, leaving behind residue that gets in the way.
This is a really common concern, and it's definitely something you should talk to your doctor about beforehand. It can also be helpful to learn about therapies that support digestive wellness. To understand more, check out our guide on whether colonics can help with bloating and constipation.
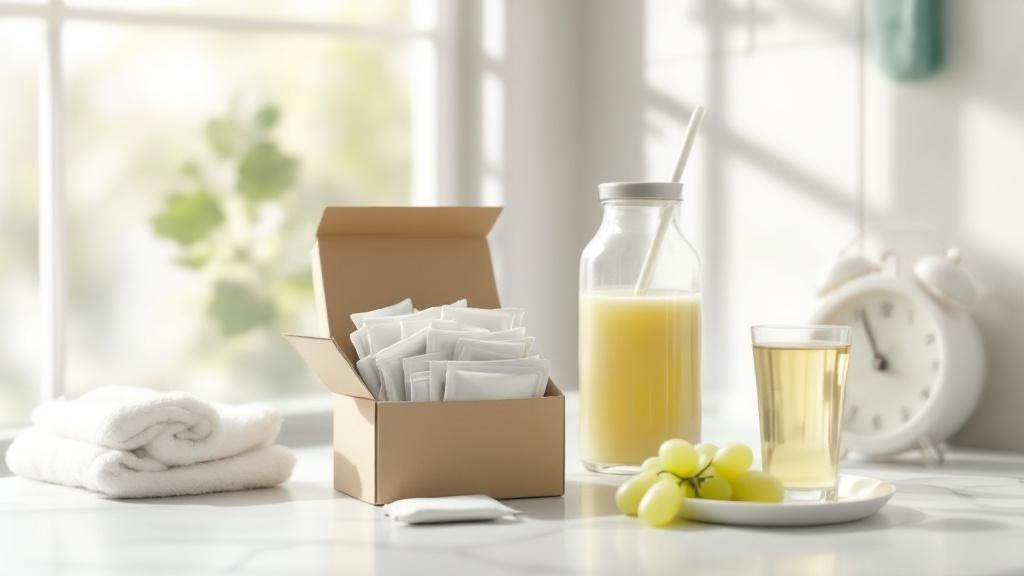
Getting to Know Your Bowel Prep Kit

When you finally get that prescription from the pharmacy, the box holding your bowel prep kit can look a little daunting. It signals the real start of your colonoscopy journey, and it's completely normal to feel a bit of apprehension.
But knowing what’s actually inside that box—and how it all works—can shift that feeling from uncertainty to empowerment. This isn't just about following the instructions on the label; it's about understanding the "why" behind the process. The entire goal of colon cleansing for a colonoscopy is to give your doctor a crystal-clear view, and your kit is engineered to do just that.
The Science of the Solution
Most of the bowel prep kits used today are built around something called an osmotic laxative, usually containing polyethylene glycol (PEG). You can think of PEG as a sort of super-sponge. Once you drink the solution, your body doesn't absorb the PEG. Instead, it makes its way through your digestive tract, pulling massive amounts of water into your colon as it goes.
This sudden influx of water achieves two critical things:
- It softens up any stool still in your colon.
- It dramatically increases the fluid volume, creating a powerful flushing effect that cleans the colon walls from top to bottom.
And it works incredibly well. A huge 2023 real-world study of over 13,000 patients revealed that PEG-based preps hit an 89.3% cleansing success rate. This is huge, because a successful prep is directly tied to a higher adenoma detection rate (ADR)—the key metric for how well your doctor can spot and remove precancerous polyps. You can dive into the details of the full study on PEG preparation effectiveness here.
This flushing action is precisely why you'll be getting well-acquainted with your bathroom. It's the whole point! But this rapid fluid loss is also why safety is built right into the kit.
You’re not just drinking a laxative; you’re consuming a medically balanced solution. The included electrolytes are just as important as the cleansing agent itself, ensuring your body stays in balance during a demanding process.
Why Electrolytes Are So Important
As your body expels all that fluid, it also loses essential minerals known as electrolytes—things like sodium, potassium, and chloride. These minerals are absolutely critical for everything from nerve function and muscle contraction to keeping your body hydrated.
If you lose too many electrolytes, you can quickly run into problems like dehydration, muscle cramps, dizziness, or even more serious issues. This is exactly why your prep solution is more than just a laxative; it's a carefully crafted cocktail that includes these vital electrolytes.
By replacing these minerals while you cleanse, the solution prevents the dangerous imbalances that could otherwise happen. This is a major reason you must use the prescribed kit and never try to whip up a homemade laxative. Your kit is designed first and foremost for your safety.
Common Bowel Prep Solution Components and Their Purpose
To help you understand what you're working with, here's a look at the key ingredients found in most standard colonoscopy prep kits and what they're doing inside your body.
| Component | Primary Function | Why It's Important |
|---|---|---|
| Polyethylene Glycol (PEG) | Osmotic Laxative | Pulls a large volume of water into the colon to initiate a powerful flushing action and liquefy stool. |
| Electrolyte Blend | Mineral Replacement | Replenishes vital minerals like sodium and potassium lost during the cleanse, preventing dehydration and imbalance. |
| Flavoring Packets | Improve Taste | Makes the solution more palatable, helping you to drink the required volume without nausea. |
These components work together to ensure your prep is not only effective for the procedure but also safe for your body throughout the process.
Practical Tips to Make Prep a Little Easier
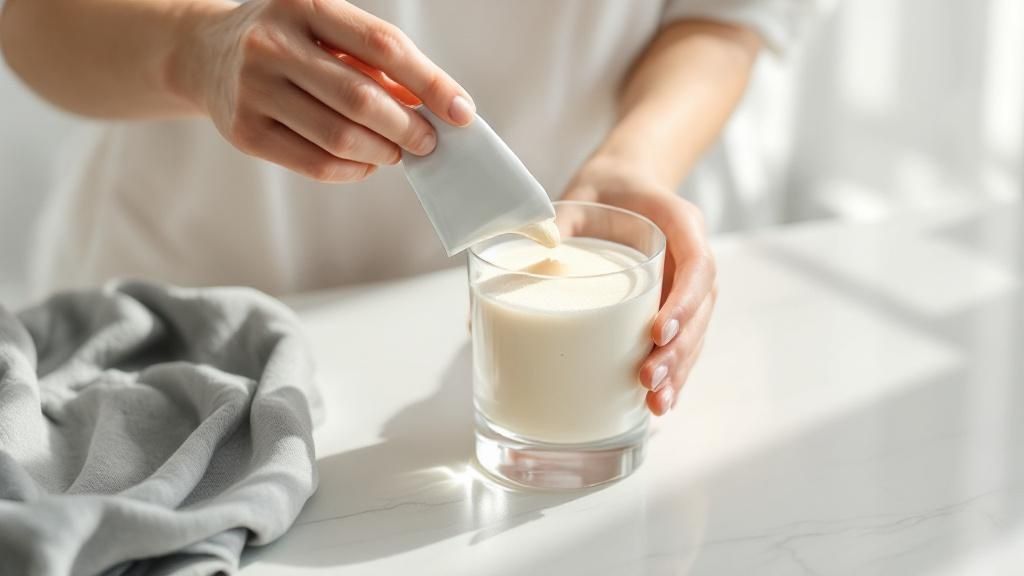
Let’s be real for a moment: nobody has ever described their prep solution as "delicious." The sheer amount you have to drink is often the biggest hurdle. But after years of guiding patients through this, I’ve picked up a few tricks that can make the experience much more bearable.
- Chill It, and I Mean Really Chill It: Everything is less potent tasting when it's ice-cold. Mix your solution a few hours ahead of time and stash it in the back of your fridge.
- Use a Straw: This is a game-changer. By placing a straw toward the back of your tongue, the liquid bypasses most of your taste buds.
- Ask About Approved Flavoring: Many kits come with their own flavor packets. If yours doesn't, check with your doctor's office to see if you can add a bit of clear flavor enhancer, like Crystal Light. Just be sure to avoid anything with red, blue, or purple dye.
- Pace Yourself with a Timer: Don't try to chug a huge amount at once. Pour a glass, set a timer for 15-20 minutes, and sip it over that time. Take a quick break, then repeat. This approach breaks a massive task down into a series of small, achievable steps.
The Low-Residue Diet Before Your Prep
The powerful laxative drink is obviously a huge part of your colonoscopy prep, but it's not the whole story. What you choose to eat in the days leading up to your procedure can make a massive difference in how well it all works.
Think of it like giving your prep solution a running start. By switching to a low-residue diet for a few days, you're essentially pre-clearing the path. This makes the final flush much easier and, more importantly, more effective for a successful exam.
A low-residue diet is exactly what it sounds like—it's designed to reduce the amount of undigested food, or "residue," that has to move through your large intestine. Leaving as little behind as possible is a critical first step in a thorough colon cleansing for colonoscopy.
Why Certain Foods Are Off-Limits
This isn't about avoiding "bad" food; it's about avoiding specific foods that are notoriously tough to digest completely. These items can hang around in the colon, leaving behind debris that might obscure your doctor's view or even get mistaken for an abnormality.
Here’s a rundown of what to steer clear of for about 3-5 days before your procedure:
- High-Fiber Foods: Normally, we love whole grains, brown rice, oatmeal, and granola. But for this prep, their high fiber content is a problem, as it leaves behind a lot of residue.
- Nuts, Seeds, and Popcorn: Be extra careful with these! Tiny particles can stubbornly cling to the colon wall, making a complete clean-out almost impossible.
- Raw Veggies and Fruits with Skins: This means things like salads, corn on the cob, peas, and unpeeled apples. The tough, fibrous parts are just too difficult for your body to break down quickly.
- Red, Blue, or Purple Foods and Drinks: The dyes in things like grape juice, red gelatin, or certain sports drinks can stain the lining of your colon. This staining can easily be mistaken for blood or inflammation during the exam, leading to unnecessary concern.
The whole point of this pre-prep diet is to make the laxative's job easier. You're not just following a list of rules—you're actively participating in your own health screening to ensure you get the clearest, most accurate results possible.
A Sample 3-Day Low-Residue Meal Plan
Sticking to a temporary diet can feel a little confusing, so here are a few simple ideas to guide you through the days before you switch to only clear liquids.
Day 1
- Breakfast: Some scrambled eggs with white toast and a bit of butter.
- Lunch: A simple turkey sandwich on white bread with mayo (hold the lettuce and tomato).
- Dinner: Baked or broiled chicken breast with a side of plain white rice.
Day 2
- Breakfast: Plain yogurt (no fruit or granola bits) and a glass of apple juice.
- Lunch: A simple, broth-based canned chicken noodle soup (avoid the creamy kinds).
- Dinner: Broiled white fish, like cod or tilapia, with some mashed potatoes (make sure they're peeled!).
Day 3 – The Clear Liquid Day
This is it—the final, and most crucial, day of your dietary prep. Absolutely no solid food. The goal here is simple: stay hydrated and keep your energy up by only consuming things you can see through.
My best advice for this day? Variety. Sipping on the same thing all day long leads to flavor fatigue and can make the day feel endless.
Approved Clear Liquid Options:
- Broth: Chicken, beef, or vegetable broth is your friend. It's savory and can help you feel more satisfied than sweet drinks alone.
- Juices: Stick to clear juices like white grape, apple, and white cranberry. Steer clear of anything with pulp, like orange juice, or dark colors, like tomato juice.
- Beverages: Water is king, but plain tea (no milk) and black coffee (no cream or sugar) are also perfectly fine.
- Gelatin and Popsicles: These can feel like a real treat! Just be absolutely sure to avoid any with red, blue, or purple coloring.
- Clear Nutritional Drinks: Some companies make clear protein or nutritional drinks. If you're worried about feeling weak, ask your doctor for a list of approved brands.
This final day of clear liquids is the last step in getting your colon ready. It ensures that when you finally start your laxative solution, your system is already well on its way to being perfectly clear for your procedure.
Creating Your Colonoscopy Prep Schedule
When it comes to a successful colonoscopy prep, timing is everything. It’s not just about what you drink, but very much about when you drink it. For years, the undisputed champion of colon prep methods has been the split-dose regimen. This approach is clinically proven to give your doctor a much clearer view than if you were to chug the entire solution the night before.
The idea is simple: you drink your prep solution in two separate rounds. The first is the evening before your procedure, and the second is on the morning of. Splitting the dose this way ensures that second round provides a final, powerful flush just a few hours before your appointment, clearing out any stubborn residue that might have settled overnight. That final flush is what makes all the difference.
The Proven Power of Split-Dose Prep
I know what you're thinking—waking up at the crack of dawn just to drink more laxative sounds awful. But the science behind it is crystal clear. The problem is, not all clinics have caught up with the best practices. A 2023 observational study revealed that while guidelines strongly recommend the split-dose method, only a shocking 32.8% of patients in the study group actually got it.
The research overwhelmingly showed that a split-dose prep leads to much better bowel preparation and a cleaner right colon, which is notoriously hard to reach. You can dig into the findings on split-dose effectiveness on pmc.ncbi.nlm.nih.gov yourself.
This visual guide breaks down how a typical split-dose plan works to get you completely clean for your procedure.
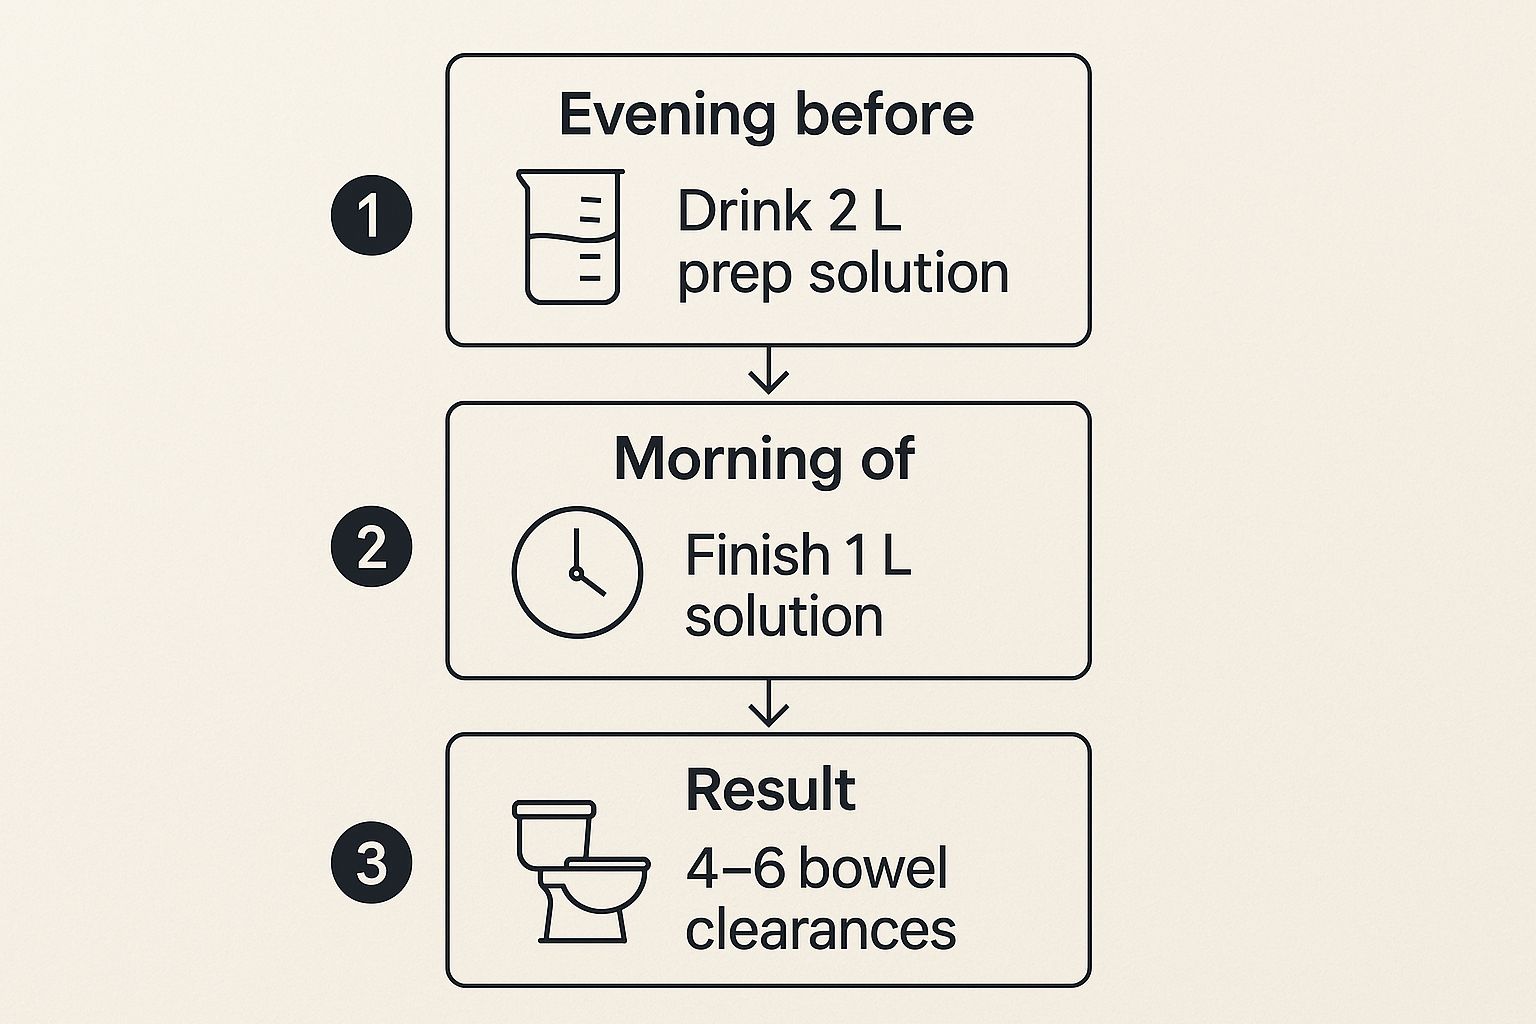
As you can see, dividing the prep into two phases creates a continuous cleansing process that keeps working right up until it's time for your appointment.
Adapting Your Schedule to Your Appointment Time
Think of your appointment time as the anchor for your entire prep schedule. You'll want to finish that final glass of prep solution about 4 to 5 hours before your procedure is set to begin. This buffer gives your body plenty of time to finish its work without you having to make frantic bathroom trips on the way to the clinic.
Let's walk through a couple of real-world examples.
Scenario 1: The Early Morning Appointment (9:00 AM)
- The Night Before (around 6:00 PM): Start drinking the first half of your prep liquid. Take your time, spreading it out over an hour or two.
- The Morning Of (around 4:00 AM): Time to get up and start on the second half of the solution.
- Finish Line (by 5:00 AM): You need to have finished every last drop of that second dose by this time to hit the 4-hour window before your 9:00 AM procedure.
Scenario 2: The Afternoon Appointment (2:00 PM)
- The Night Before (around 7:00 PM): Begin drinking the first portion of your prep solution.
- The Morning Of (around 9:00 AM): Get started on the second half of the solution.
- Finish Line (by 10:00 AM): Make sure you've finished the entire second dose by this time. This ensures you're completely clear and comfortable for your 2:00 PM appointment.
No matter when your appointment is, the core principle is the same: the gap between your last drink and the start of your colonoscopy is non-negotiable. Following your doctor's specific timing instructions is just as vital as finishing the entire prep solution.
Of course. Here is the rewritten section, crafted to sound like an experienced human expert while adhering to all your requirements.
Considering Professional Colon Hydrotherapy
Beyond the standard prep kit your doctor gives you, some people look for other ways to get the cleanest possible colon for their procedure. One option that comes up pretty often is professional colon hydrotherapy, which you might also hear called a colonic or colonic irrigation.
It’s really important to understand this right up front: a colonic is not a replacement for the medical prep your gastroenterologist prescribed. Think of it as a potential add-on for very specific situations.
For most people, the standard prep works just fine. But what if you’ve struggled with chronic constipation for years? Or maybe you’ve been through this before and had a "failed prep," where your colon wasn't clean enough and the whole thing had to be rescheduled. In those cases, a supplemental cleanse might be worth discussing with your doctor to avoid a repeat of a difficult prep day.
What Is Colon Hydrotherapy, Anyway?
So, what actually happens during a session? Colon hydrotherapy is a gentle process where warm, filtered water is slowly introduced into your colon through a small, sterile tube. The water helps to soften and loosen any stubborn, impacted waste, which is then flushed out. A certified therapist is with you the entire time, managing the water flow and pressure to make sure everything is safe and comfortable.
The biggest difference between this and a simple enema is the sheer scope of the cleanse. An enema usually only reaches the very end of the colon—the rectum and sigmoid colon. Hydrotherapy, on the other hand, is designed to hydrate and cleanse the entire length of the large intestine.
Important Note: You absolutely must talk to your gastroenterologist before you even think about booking this. Colon hydrotherapy isn't safe or suitable for everyone, especially if you have conditions like diverticulitis, Crohn's disease, severe hemorrhoids, or a history of colon surgery. Getting your doctor's green light is non-negotiable.
Finding a Certified and Reputable Therapist
If you and your doctor agree this could be a helpful step for you, your next mission is to find a truly qualified professional. This isn't the time to bargain hunt. Your safety is everything, so you need to find a therapist with legitimate credentials and a solid track record.
Here’s what you should be looking for in a provider:
- Certification: A good therapist will be certified by a professional organization like the Global Professional Association for Colon Therapy (GPACT) or the International Association for Colon Hydrotherapy (I-ACT).
- Hygiene Standards: The facility should be spotless. Don’t be shy—ask about their sanitation protocols. They must use disposable, single-use tubes and nozzles for every single client. No exceptions.
- Experience: Ask how much experience they have, specifically with clients getting ready for a colonoscopy. Someone who's done this before will understand the specific goals and nuances of this type of prep.
For our clients in Southern California, Healing Waters Wellness Center is a great example of what a professional clinic should look like. You can get a better sense of their approach and what a high-quality service entails by checking out their page on professional colon hydrotherapy services. This will give you a solid benchmark for what to expect, no matter where you're located.
Key Questions to Ask Before Your Session
Once you have a potential therapist in mind, it’s time to ask some direct questions to make sure you feel completely comfortable and safe. Any true professional will be happy to answer and will give you clear, straightforward information.
Questions for Your Potential Therapist
- What kind of equipment do you use (is it an open or closed system)?
- How is the equipment sanitized between clients?
- How long have you been a therapist, and what are your certifications?
- What should I expect to feel during and after the session?
Having this conversation builds trust and helps confirm you're putting your care in the right hands. Ultimately, choosing to get colon hydrotherapy is a personal decision you make with your medical team. For a small number of patients, it can be the extra step that makes all the difference between a failed prep and a successful, potentially life-saving colonoscopy.
Have Questions About Your Colonoscopy Prep?
Even with the clearest instructions from your doctor, it's totally normal for questions and a bit of anxiety to pop up during your colonoscopy prep. You might wonder if what you're feeling is typical, or if you're really doing it right. I get it. We've heard all the questions over the years.
This section is all about tackling those common, last-minute worries head-on. Let's clear up the confusion so you can feel confident and get through this with peace of mind.
What if the Prep Solution Makes Me Feel Sick?
This is, without a doubt, the most frequent issue people face. Trying to drink that much liquid, especially one with a specific taste and texture, can be a lot for your stomach to handle. Feeling queasy, bloated, or just plain "off" is incredibly common.
The very first thing you should do is slow down. You don't need to chug it. Take a break for 30-45 minutes to let your stomach settle. Often, that's all it takes. Another pro-tip is to chill the solution beforehand and sip it slowly through a straw—it can make a world of difference.
If you continue to feel nauseous and actually start vomiting, it's time to call your doctor's office. They need to know what's going on. They might prescribe an anti-nausea medication or offer other advice to make sure you can finish the prep safely and effectively.
Can I Just Use a "Natural" Cleanse Instead of the Kit?
In one word: no. This is a hard-and-fast rule for a very good reason. While you might see herbal laxative teas, salt water flushes, or other supplements marketed for "detoxing," they are absolutely not a substitute for a medical-grade bowel prep.
Your prescribed kit is a specific medical product, carefully formulated to do one critical job: completely clean out your colon so the doctor can get a clear view. These kits have a precise mix of osmotic laxatives and electrolytes designed to be effective and prevent you from getting dangerously dehydrated or throwing your electrolytes out of balance. Sticking to the plan is a matter of safety and success.
Honestly, one of the biggest reasons colonoscopies have to be canceled and rescheduled is because the prep wasn't complete. Trying to use an unproven alternative puts you at a huge risk for an inadequate cleanse, which wastes everyone's time—especially yours.
How Do I Know the Prep Is Actually Working (And When Am I "Done")?
This is a great question, and the answer is pretty visual. You'll definitely know the prep is working when your bowel movements are no longer solid at all. At first, you'll pass brown liquid. As the hours go by and the prep continues its work, the output gets lighter and lighter in color.
The goal is to have your output be a transparent, yellowish liquid. It should look a lot like urine. If you can clearly see the bottom of the toilet bowl through the liquid, you're in fantastic shape. If it's still cloudy or you see any solid flecks, you've still got a little more cleaning out to do.
Can I Please Have My Morning Coffee on Prep Day?
For so many of us, the idea of skipping morning coffee is almost worse than the prep itself! Good news: you can usually have it, but there are a few non-negotiable rules.
- It must be black. No milk, no cream, no powdered creamers, and definitely no sugar. Anything you add makes it no longer a "clear liquid" and will mess up your prep.
- Always double-check. While black coffee is generally fine on a clear-liquid diet, some clinics have slightly different rules. Always refer back to the specific instructions they gave you.
- Don't forget to hydrate. Coffee is a diuretic, which can work against you when you're trying to stay hydrated. Make sure you're also drinking plenty of water and other approved clear liquids.
Navigating these final hours can feel a bit intense, but remember that these are the questions almost everyone has. For more expert advice on digestive wellness and getting your body ready for optimal health, feel free to explore the other topics on the Healing Waters Wellness Center blog. The right information is the key to feeling empowered on your health journey.
Article created using Outrank